If you work or live with kids who need a little extra “nudge” when it comes to transitioning between activities throughout the day, this method of creating an interactive picture schedule is for you!

Why Do Picture Schedules Work?
Helping kids make smooth transitions between tasks and activities throughout the day is so important, whether they’re at home, at school, or out in the community! As therapists, we may have to help kids transition between activities during our therapy sessions. Teachers may need to support kids in transitioning between lessons and learning activities throughout the school day. Parents often run into tantrums and other difficulties with transitions at home or when moving from one part of the day to another.
Transitions can be especially difficult when we’re asking a child to move from a preferred activity to a non-preferred activity (e.g. leaving the playground to go home and take a nap).
This is where picture schedules can come into play!
When kids have a visual representation of what’s coming next, transitions often become a lot easier. This is because kids thrive on the reassurance of routine and knowing what’s coming next. Most of us feel more at ease when we know what is going to be expected of us, including adults! When you’re done creating this interactive visual schedule for kids, check out this mom’s daily to-do list, which can help ease some of the feeling of overwhelm that parents often feel!
There are tons of great reasons to use a visual schedule throughout the day!
Click here to learn the basics of how to make a visual schedule.
And click the link here to learn more about another one of our favorite strategies to support transitions – visual timers for kids!
Looking for printable daily routine cards for kids? Check these out from The Military Wife and Mom
How to Create an Interactive Picture Schedule in Just 10 Minutes!
Now that we’ve covered how and why picture schedules work, we wanted to share a super simple way to create your own interactive visual schedules using Google Slides!
Check out the video below to learn how it’s done…
Follow these simple steps to create your own interactive digital schedule:
1 || Save all of the images or photographs for your schedule in a folder on your computer. You’ll also want an image like a check mark or something to symbolize that an activity is finished.
2 || Open a blank slideshow and give it a title.
3 || Upload the images for your schedule into the first slide of your slideshow.
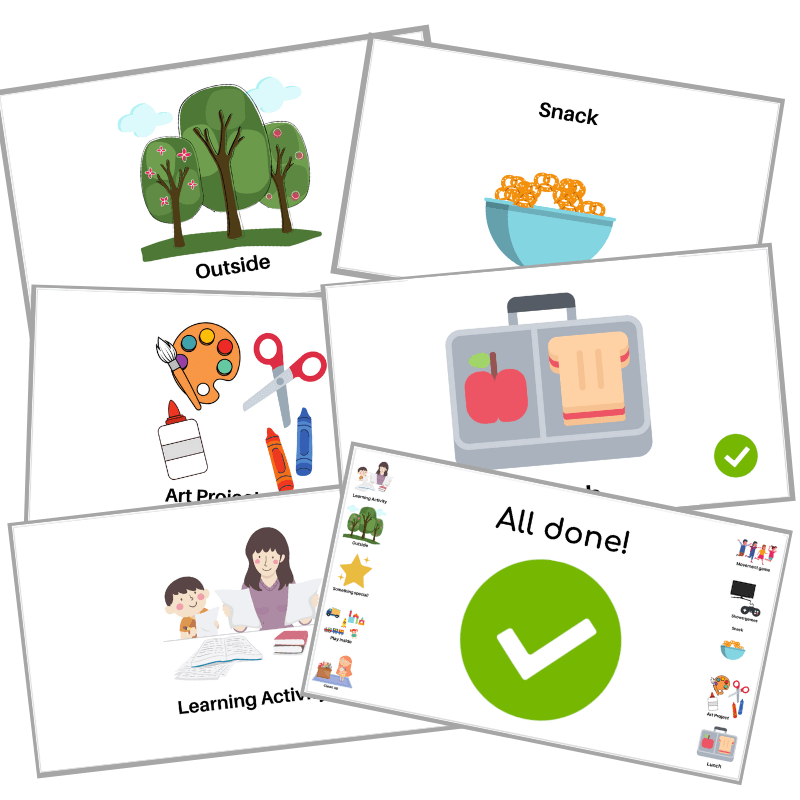
4 || Move and resize your images to create the “Main Menu/Hub” page of your schedule. Place the “All Done” image in the center (resize it so it takes up most of the slide). Resize the other images so they’re smaller and drag them to the edges of the slide.
5 || Create as many blank slides above your “Main Menu/Hub” page as you have activities in your schedule.
6 || Copy and paste each individual image from your “Main Menu/Hub” page onto its own slide and resize each so they takes up most of the slide.
7 || Copy and paste your “All Done” image onto each of the slides, resizing it so it’s positioned in the bottom right corner.
8 || Return to your “Main Menu/Hub” page. Click on one of the smaller images.
9 || Click “Insert” in the top dropdown menu of Google Slides. Then click “Link”. Click “Slides in This Presentation”.
10 || Link the image on the “Main Menu/Hub” page to the corresponding slide in the slideshow. Repeat this for all of the images on the “Main Menu/Hub “page.
11 || Go through each slide in your slideshow and link the small “All Done” images to the “Main Menu/Hub” page.
How to Use Your Interactive Picture Schedule
Now your schedule is ready to use! Simply enter into “Presentation” mode in Google Slides and click on the images to navigate through the schedule.
Click on the first activity to show the child what you’ll be doing first. When the activity is finished, have the child click the “All Done” image to return to the “Main Menu/Hub” page. From there, click on your next activity!
You can use the schedule on a mobile device or on desktop.
Hoping this setup will help you create smooth transitions between activities for the kids in your therapy practice, classroom, or home!
Visual schedules are an amazing tool for transitions. But what do you do when you have an awkward few minutes left in your therapy session, or when you’re running a bit early for the transition to your next activity? Check out these quick, skill-boosting filler activities!

[…] to ensure carryover at home. For example, try introducing transition strategies, visual timers, visual schedules, etc. Remember, if you are a school-based therapist providing virtual sessions for kids who are […]