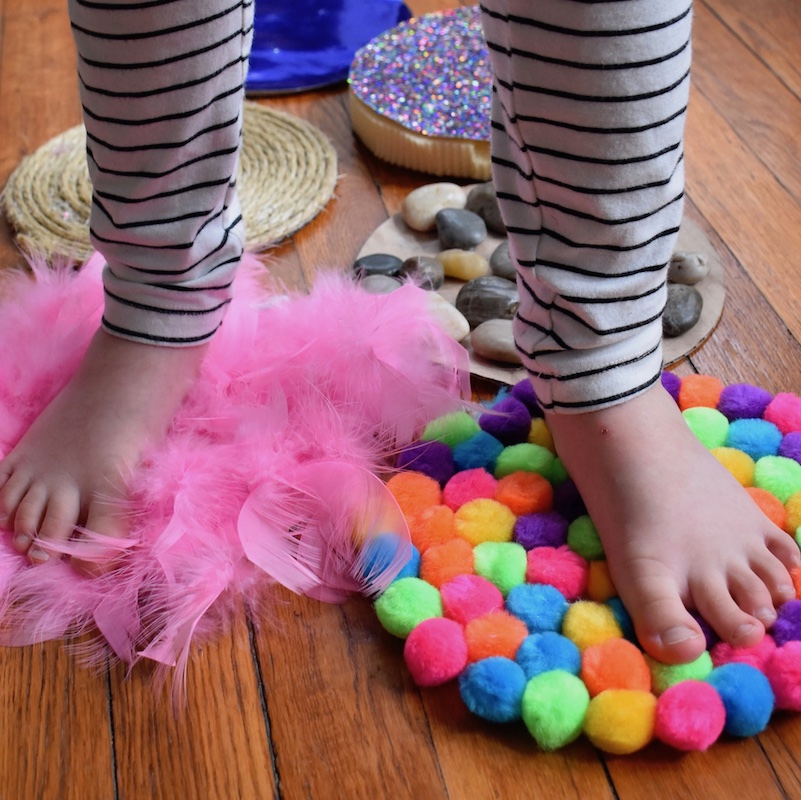
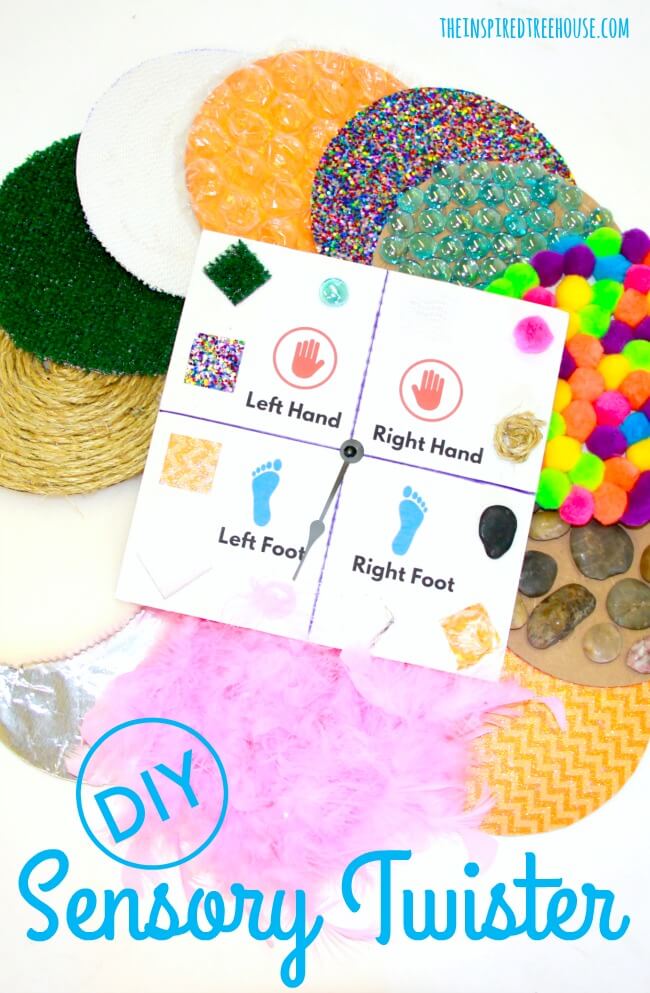
If you’re looking for DIY games to include in your therapy practice, classroom, or just to try at home with your kiddos, look no further. This bright, colorful sensory game will target tons of skills at once and keep kids occupied for the whole afternoon!
*This post contains affiliate links. Read more.
Have you ever had an idea that you knew was really great, but you couldn’t find the right way to execute it? That’s what happened here at the treehouse last year.
Claire had this amazing idea to create a game like the old classic, Twister. Only the game in her head had different textures that a child would touch as they twisted, turned, and bent their little vestibular systems into a state of euphoria.
The problem? She couldn’t figure out how to bring this brilliant concept to life without significant cost.
The solution? Teamwork! And, guys, we seriously think this is the coolest activity we have ever come up with. The pictures speak for themselves, but we didn’t think it would hurt to give you a little DIY instruction too.
This activity is straight from the pages of our book, Playful Learning Lab for Kids! Get your copy today and learn how to use this activity to promote language and vocabulary development. In the book, you’ll find ways to maximize the sensory experience in this activity and other fun ways to use this activity for learning.
Materials:
-12 – 8” White, Cardboard, Round Cake Bases
-1 – 12” White, Cardboard, Square Cake Base (you can also just cut out a square from a box; however, I was a bit lazy and am a perfectionist!) :)
-Different materials to cover the bases with — be creative! This is only limited to your imagination! Suggestions: shiny paper, rocks, foam, bubble wrap, rope, feathers, pompoms
–Rubber Shelf Liner to make the bottom of your creations “stick” to the floor
–Hot glue gun and glue sticks
-a clock hand from the craft store
-2 small metal washers (these go on the top side to lift the clock hand up from the cardboard so that it spins).
-a long brad fastener
Instructions for the Game pieces:
1 || Using the cake base as a template, trace the 8” circle onto each of your materials that you plan to cover your 15 circles in.
2 || Cut out each of those circles
3 || Hot glue each material to individual cake bases
4 || Cut out 4” x 4” squares of shelf liner and glue to the bottom of each of your covered cake bases.
Instructions for the Spinner:
1 || Draw lines through the middle of the square cake base to mark the middle and the 4 quadrants of the spinner.
2 || Take samples of each of the materials that you used to cover the round cake bases and glue them onto the square cake base. Make sure to keep an even number in each quadrant. We had 3 in each of the 4 quadrants.
3 || Make a hole through the center of the square of cardboard. Construct your spinner using the clock hand, metal washers, and brad fastener.
4 || Layer the clock hand and 2 washers. Put the brad down through the center and then through the cardboard, spread out the tails to keep it intact.
That’s it! When you’re ready to play, the rules are just like the old game of Twister. Just a little planning and work ahead of time and you’ll have this awesome game ready to go in your therapy bag all year long!


Latest posts by Lauren Drobnjak (see all)
- End of the Year Gifts for Therapists - April 14, 2024
- Playful Therapy Posters to Spruce Up Your Room - March 30, 2024
- How to Help a Baby Crawl & Creative Crawling Patterns We See in Therapy - March 19, 2024


